Expanding your Steam library to include non-Steam games can significantly enhance your gaming experience, allowing you to organize all your titles in one convenient place. Whether it’s an emulator, a game launcher, or a standalone application, adding these programs to Steam transforms how you access and manage your collection. Plus, customizing icons and artwork helps you create a visually appealing and personalized game library. Follow this comprehensive guide to seamlessly integrate non-Steam titles into Steam and give them a professional, polished look.
How to Incorporate Non-Steam Titles into Your Steam Library
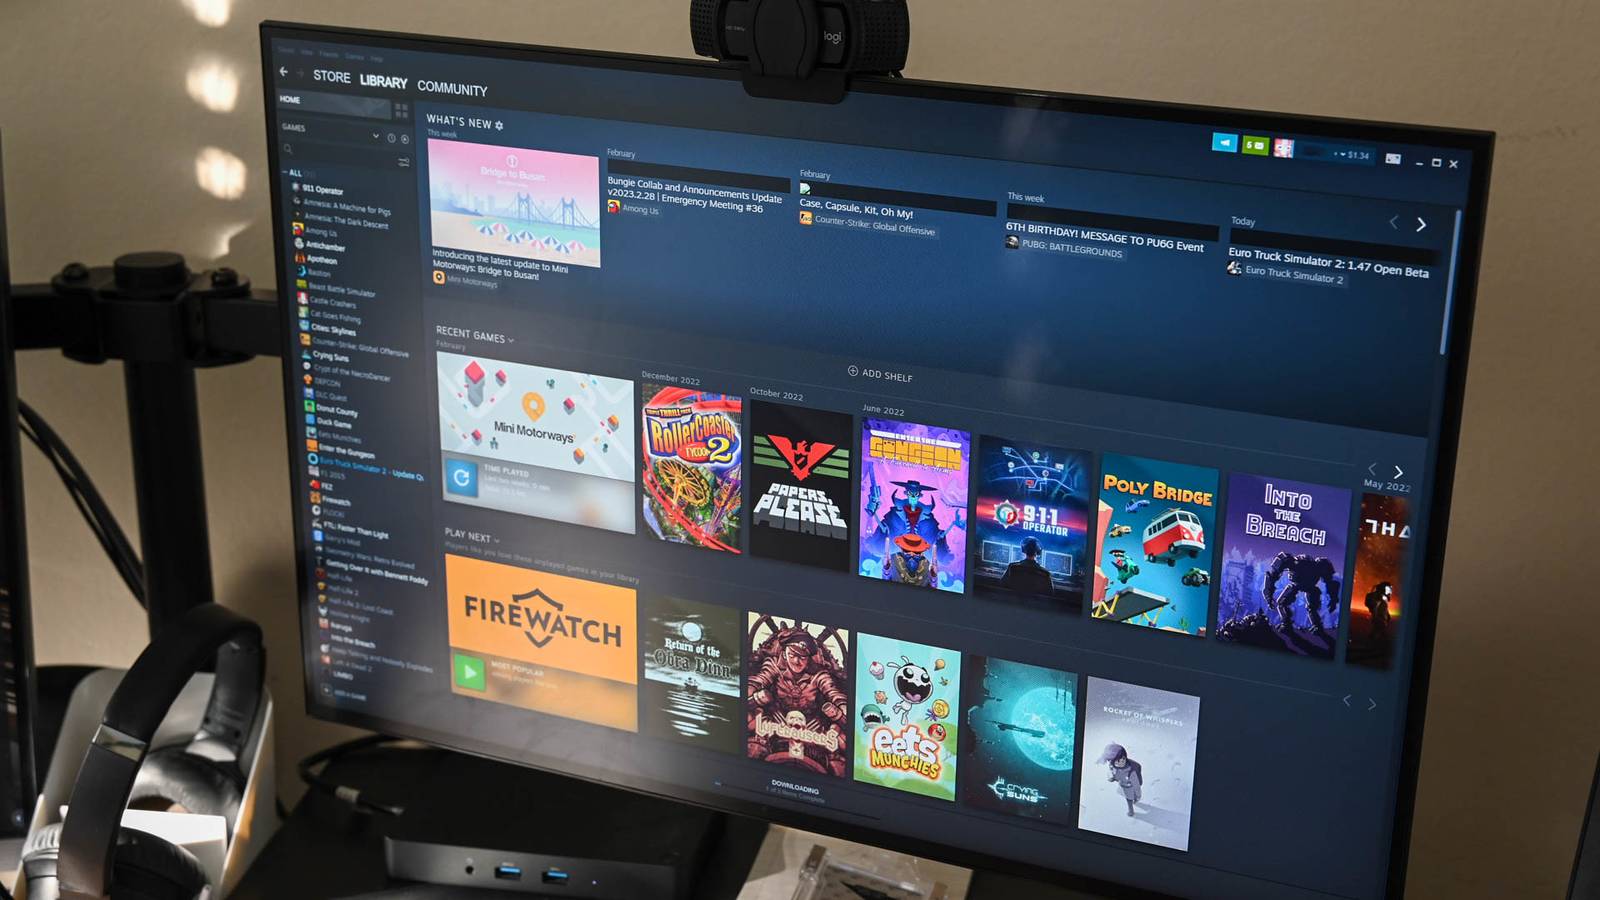
Adding non-Steam games is straightforward and requires only a few clicks. Open your Steam client and navigate to the menu bar. From there, select Games > Add a Non-Steam Game to My Library. This action opens a window displaying all your installed applications and games. You can select individual titles or multiple items at once, including not only standalone games but also tools like benchmarking software or emulators, which are often stored as executable files (.exe). Remember, the core function of this feature is to create quick access shortcuts, making launching these programs more convenient.
Once you’ve made your selections, click Add Selected Programs. These applications now appear in your Steam library, although they initially lack custom icons or cover art. To launch your non-Steam titles, simply open Steam, navigate to your library, and click on the game or application. It’s a simple way to centralize your software without changing how they work. For more advanced users interested in game development, exploring pathways to becoming a game developer can provide valuable insights.
How to Personalize Your Non-Steam Games with Custom Icons and Artwork
A well-organized and visually appealing collection enhances the gaming experience. By default, Steam assigns generic icons and cover art to your non-Steam entries, which can make your library look cluttered and unprofessional. Customizing these visuals not only makes your library more attractive but also helps you quickly identify your favorite titles, especially in Big Picture mode.
Before customizing, gather the artwork you need. You can find icons embedded within game executables or search for images online. Popular resources include SteamGridDB, which hosts a vast collection of user-created artwork specifically designed for Steam. You can filter results by size and style, such as icons, banners, or logos, to suit your needs. Additionally, sites like DeviantArt offer unique custom images if you’re seeking something more personalized.
Assigning Custom Icons
Start by selecting the non-Steam game in your desktop Steam client. Right-click on the title and choose Properties. In the Shortcut tab, click the blank space next to the game’s name. A file browser will appear, allowing you to select an executable or a PNG image of your preferred icon. Once selected, the game’s icon will update in your library, giving it a distinct look that stands out from the default.
Interesting:
Updating Cover Art
To change the cover art, right-click the game in your library and choose Manage > Set Custom Artwork. Browse your files for the desired image—preferably a PNG or JPG—and open it. The new artwork will replace the default image on your library shelves and in Big Picture view, making your collection visually cohesive and personalized.
Customizing Backgrounds and Logos
For more advanced visual customization, you can add custom backgrounds and logos. Right-click the game in your library, then select Set Custom Background or Set Custom Logo. Choose your images, and if necessary, adjust the position and size by right-clicking the banner and selecting Adjust Logo Position. This level of customization allows you to create a truly tailored collection that reflects your style.
Benefits of Integrating Non-Steam Games into Your Library
Adding non-Steam titles to your library isn’t just about organization; it unlocks several benefits. You can enjoy Steam’s in-game overlay for non-Steam games, enabling quick chat, screenshots, and streaming—features that normally require native Steam support. Moreover, having all your games in one place simplifies launching and managing your library, especially when you have a mix of Steam and non-Steam titles.
However, keep in mind that Steam doesn’t automatically sync saves, stats, or updates for these added games. If you want to explore more about game development or learn about the different ways to expand your gaming skills, reading guides on the pathways to becoming a game developer can be highly beneficial. For instance, you might be interested in how many offices are in game dev story, which gives insight into the industry’s structure.
How to Remove Non-Steam Titles from Your Library
If you decide to remove a non-Steam game from your library, the process is simple. Launch Steam, go to your library, right-click the game, and select Manage > Remove Non-Steam Game From Your Library. This action only deletes the shortcut from Steam and does not affect the actual files stored on your computer. Removing unnecessary entries keeps your library clean and focused on your favorite titles.
By mastering these steps, you can enjoy a customized, organized, and visually appealing gaming library that consolidates all your titles in one place. Whether you’re adding emulators, benchmarks, or classic games, Steam provides a flexible and user-friendly platform for managing your entire collection.